By Pauline Wegrzyn
As a physiotherapist, it is surprising how often I hear the same complaints regarding people’s necks and backs from people who work sitting at a desk.
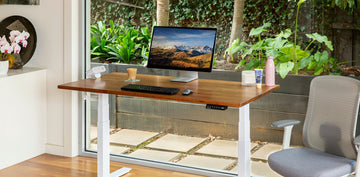
If you are lucky enough to have a sit-stand desk, you are already far ahead of the curve. Being able to adjust your desk throughout the day and decrease the amount of time you spend sitting is a huge advantage. However, you may still be experiencing neck, shoulder, or back pain despite being able to vary your position and posture throughout the day.
The information below is based on common patterns of weakness or tension that are commonly found in individuals who work sitting at a desk. However, it is important to remember that without a physical assessment from a qualified health professional, it is not possible to know exactly what would best suit every individual’s needs. Things vary between individuals, and there is no one size fits all solution.
The exercises below can be done while using a standing desk and may help improve symptoms of neck, shoulder, and back pain and stiffness.
Chin Tuck
This exercise strengthens the deep neck flexors in the neck. These muscles prevent our necks from creeping forward and our chins from poking out. It is an excellent exercise for individuals with chronic neck pain who spend a lot of time looking at screens or down at paperwork.
This exercise can be done while seated or standing. To begin, assume your neutral, natural neck posture. From here, do a small nod yes, which will bring your chin down and slightly closer to your chest. This is the starting position for this exercise. Next, keeping your chin in this position, use the muscles in the front of your neck to bring your chin backwards towards your neck in a horizontal line. You are moving straight back, not further down. It will look like you are giving yourself a double chin.
Hold this position for ten seconds, and then return to your neutral neck posture. Repeat this process for three sets of ten repetitions (a total of thirty times).

Forward head posture

Neck positioned in neutral

Chin tuck exercise
To make this exercise more challenging, perform a chin tuck with your back against a wall. Keeping the chin tuck, rotate your neck to one side. Return to neutral and let your neck return to its natural position. Then, repeat the process and turn your head in the other direction.
Consistently doing chin tucks will increase the endurance of your deep neck flexors, and decrease forward head posture. Your neck will be able to be in a better natural resting position at work while looking at your screen, and can prevent a lot of neck pain and stiffness in the future.
Scapular Setting
The position of our scapula, or shoulder blades, impacts how our upper backs, shoulders, and necks are positioned. This exercise helps to improve the awareness of our posture, and strengthen some of the postural stabilizer muscles that are found in our upper backs.
To start this exercise, reflect upon your standing posture. Are your shoulders rounded forward? Is your neck drooping downwards? Is your upper back hunched forward? Then, picture as if a string is pulling you up towards the ceiling, slowly stacking each vertebrae on top of the other, in order to give you a more neutral posture. This is the starting position of the exercise.
While focusing on your upper back being straight, think about widening your collarbones and un-rounding your shoulders, which are likely sitting forward. Next, relax your upper shoulder and neck muscles to bring your shoulder blades down towards the floor. We often hold tension in these muscles, and our shoulders creep up towards our ears throughout the day.
To complete the exercise, bring your shoulder blades towards your opposite back pocket of your pants; your left shoulder blade will go down and towards the right, and your right shoulder blade will go down and towards the left. Move both of your shoulder blades at the same time. This will engage the muscles in between and directly below your shoulder blades. Hold this position for five seconds, and then relax.
Repeat this process a total of thirty times (10 reps, 3 sets), all the while reflecting upon how up and rounded forward your shoulders tend to sit when you are not performing this exercise. When you are done with your repetitions, try to keep your shoulder blades in this more neutral position, down and in as compared to up and out.

Pelvic Tilt
This exercise promotes a better posture and position of our pelvis and lumbar spine. It is a very effective exercise for individuals with persistent low back or sacroiliac joint/tailbone pain, and can help improve our standing posture over time.
When standing at a sit-stand desk, our pelvis (the lower part of our trunk between our abdomen and our thighs) can either be tilted too far anteriorly, which makes our tummies stick farther out, or too far posteriorly, which makes our buttocks look like they are rolled backwards, depending on our habitual standing posture. This influences the posture in our low backs. If your pelvis is tilted anteriorly, the curve in your low back will be larger. If your pelvis is tilted posteriorly, the curve in your low back is flattened.
To start this exercise, rock your pelvis as far forward as you can. Then, slowly reverse this position and bring it as far backwards as you can, paying attention to when your pelvis is in between these two extreme ranges. This position is known as the neutral pelvic position, and it should be where your pelvis is positioned while you are standing.
Perform about thirty tilts back and forth (10 reps, 3 sets), all the while noting when you pass by the midline, or neutral zone. After thirty repetitions, return to this neutral positioning of your pelvis and try to maintain this position while you stand.

Pelvis tilted forward

Pelvis tilted backwards

Pelvis in neutral
This exercise can also be done in sitting. As we sit, our pelvis tends to tuck underneath us as opposed to being anteriorly tilted, as it is meant to. Lumbar support rolls are cushions that are meant to improve this pelvic position and encourage us to sit with it tilted more anteriorly. They are commonly found in ergonomic chairs and even car seats, and are positioned at your lower back.
This exercise can help you build an awareness and strength of the muscles that support this neutral pelvic positioning, which can improve your sitting posture when you take a break from standing during your work day.
Equipment to use for Standing Desk Exercises
If you are looking for more novel exercise ideas to do at your standing desk, try to incorporate equipment such as balance boards or exercise balls.
Balance boards are a great exercise as they require you to use your small stabilizer muscles throughout the day to keep your balance while standing. They help strengthen the small muscles in your pelvis and lower back if you stand and move on them in the neutral pelvic posture discussed above. The small movements are better for you than static standing, as it improves blood flow to your feet and lower extremities. Lastly, balance boards improve your focus as they keep you alert throughout the day.
Exercise balls are another good tool. Try sitting on an exercise ball instead of a chair, and you will see that your low back, pelvis, and upper back muscles will become a lot stronger as they are working to keep you balanced on the ball. Exercise balls and balance boards have much of the same benefits. However, it is important to note that both of these pieces of equipment can bring more harm than benefit if used in poor sitting and standing posture.
Did you find our blog helpful? Then consider checking:
- Standing Desk Posture
- Stand Up Desk Benefits
- How Long Should You Stand At A Standing Desk
- Is A Standing Desk Better For You Than Sitting
- Can Standing Desks Help Lose Weight
- Are Standing Desks Good For Lower Back Pain
- Is A Standing Desk Better For Your Back
- Standing Desks And ADHD
- Standing Desks And Blood Pressure
- Standing Desks Varicose Veins
- Is Standing Desk Bad For Knees
- Is It Bad To Use A Standing Desk All Day
- Standing Desks And Neck Pain